
How to connect Hostaway to Bookably
If you manage your properties in Hostaway, you can bring them onto Bookably in a few minutes. Once connected, Bookably imports the listings you choose, keeps your calendars and bookings in step so you are never double-booked, and passes guest messages through to your Hostaway inbox. Connecting is free, and Bookably charges 0% booking commission and no guest service fee, so the price travellers see is the price you set.
Your Hostaway account stays the source of truth. You keep managing property details, photos and pricing in Hostaway, and Bookably keeps your imported listings in step.
What you will need before you start
- A Hostaway account with permission to create API credentials.
- Your Hostaway Account ID and API key, created from the Bookably listing in the Hostaway Marketplace (covered in Step 3).
- A Bookably host account. If you do not have one yet, you can create it when you connect.
A quick note on which listings can be imported: Bookably mirrors whole-property rentals priced in New Zealand dollars. Individual rooms, and listings priced in other currencies, are shown during the preview step but are not imported. Nothing in your Hostaway account is changed either way.
New to Bookably? Start from the Hostaway Marketplace
If you do not have a Bookably account yet, the quickest way in is from Hostaway itself. Open the Marketplace in your Hostaway dashboard and find the Bookably tile, or go straight to the Bookably listing.
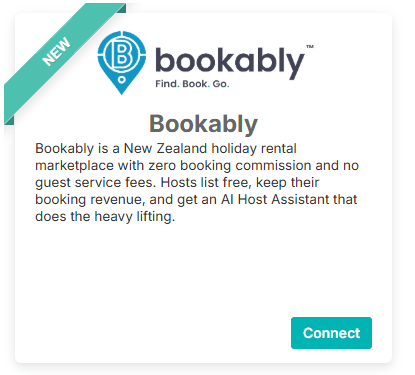
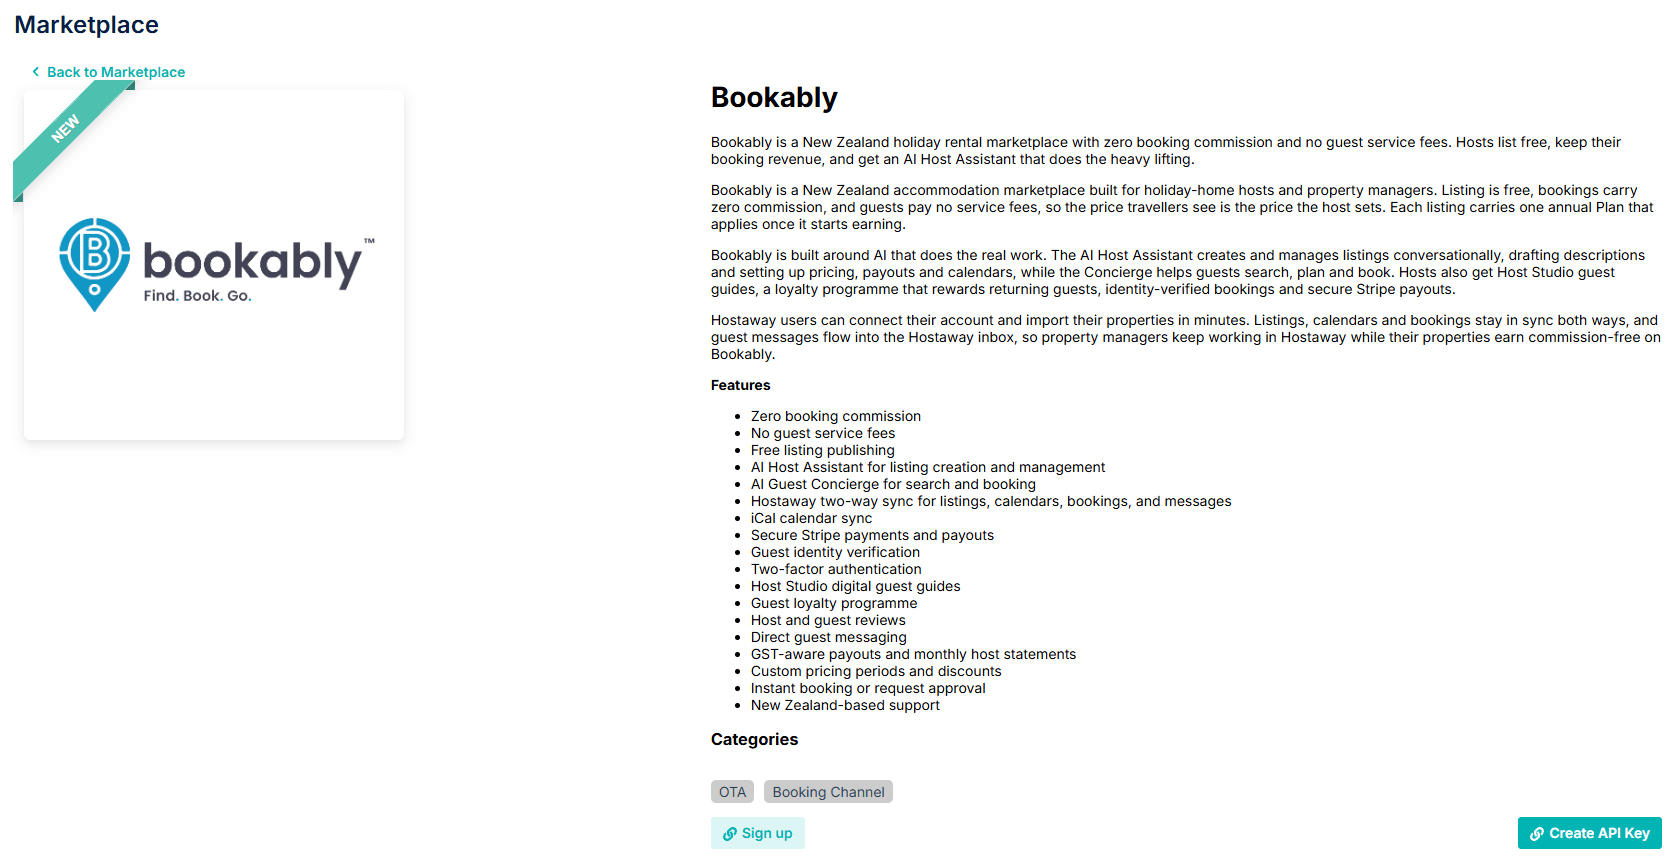
Select Connect on the tile to open the full listing. From there, Create API Key generates the credentials you will paste in at Step 3. The listing also carries a Sign up button, which takes anyone who does not have a Bookably account yet through to create one.
Step 1: Start the import from the Host Assistant
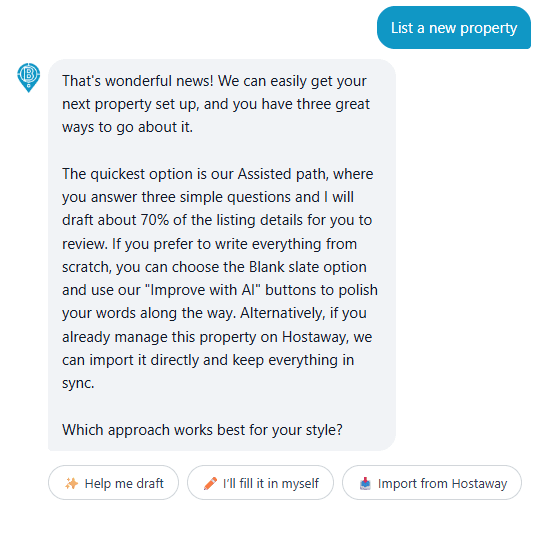
Open the Host Assistant and choose List a new property. The Assistant offers three ways to begin. Choose Import from Hostaway.
Step 2: See what Bookably will do
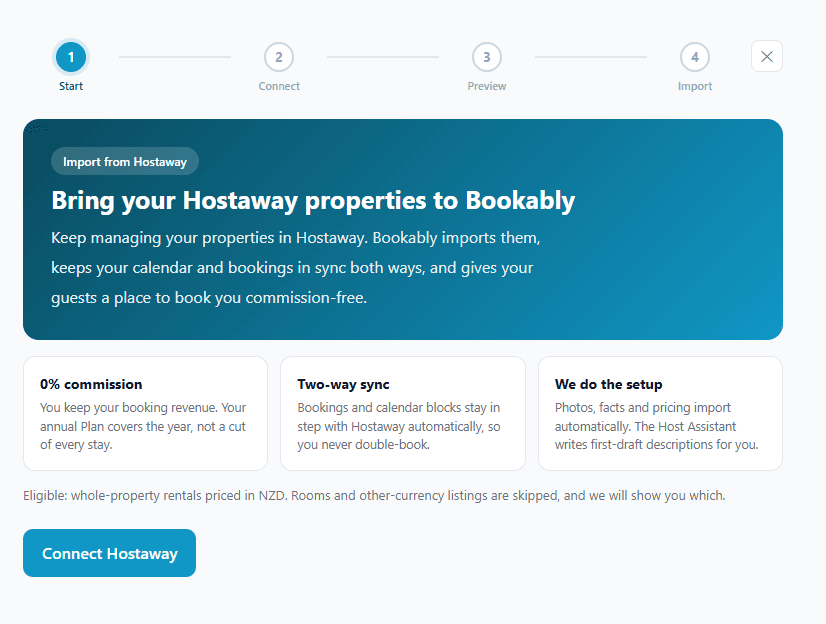
The import opens on a short overview: Bookably imports your listings, keeps your calendar and bookings in sync both ways, and gives your guests a place to book you commission-free. When you are ready, select Connect Hostaway.
Step 3: Connect your account
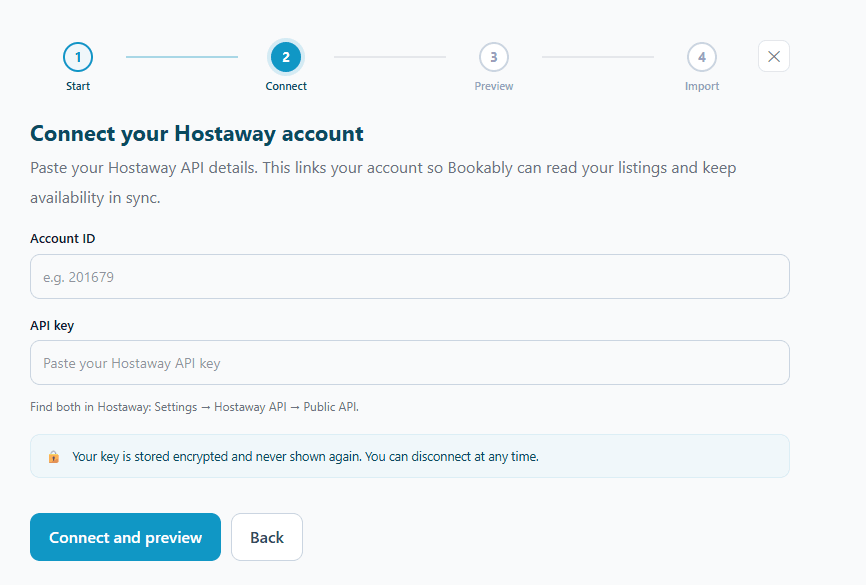
Bookably connects using an API key that you create from the Bookably listing in the Hostaway Marketplace. Open it and select Create API Key. Hostaway shows you an Account ID and an API key. Copy both, and keep the key somewhere safe, as Hostaway shows it only once.
Back in Bookably, paste the Account ID and API key into the Connect step, then select Connect and preview. Your key is stored encrypted and never shown again, and you can disconnect at any time.
Step 4: Preview and choose your listings
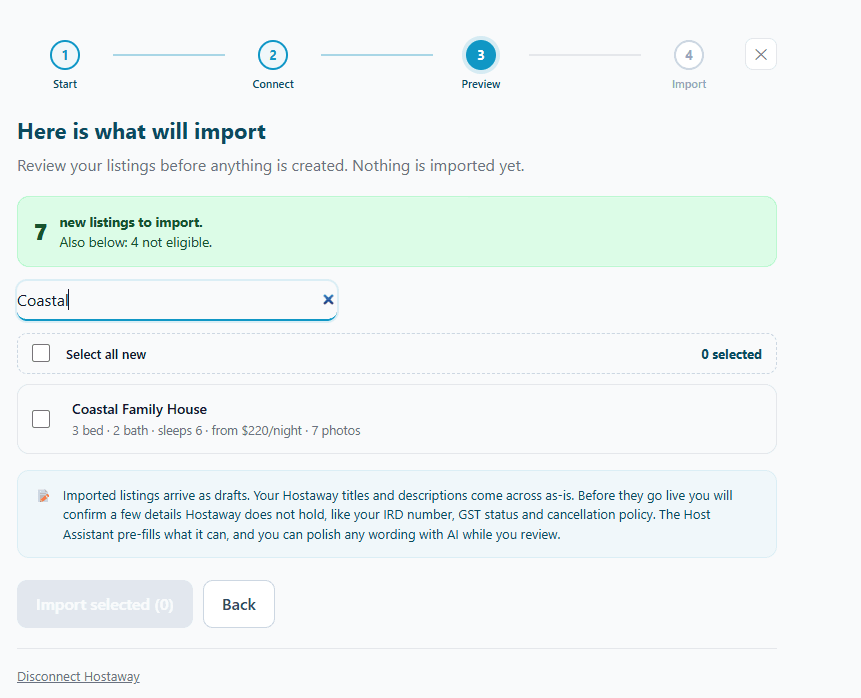
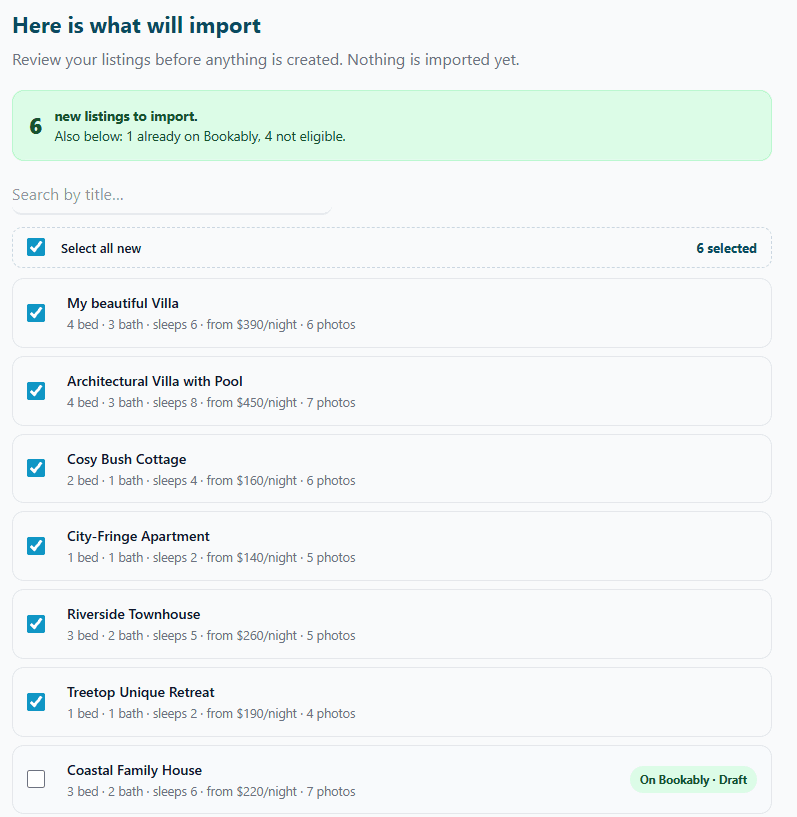
Before anything is created, Bookably shows you a preview of the listings found in your Hostaway account. Nothing is imported yet. Eligible listings are listed with a tick box (all selected by default); you can search by title and untick any you do not want yet. Listings that are not eligible, for example priced in another currency or a single room, are shown lower down with the reason, and cannot be selected.
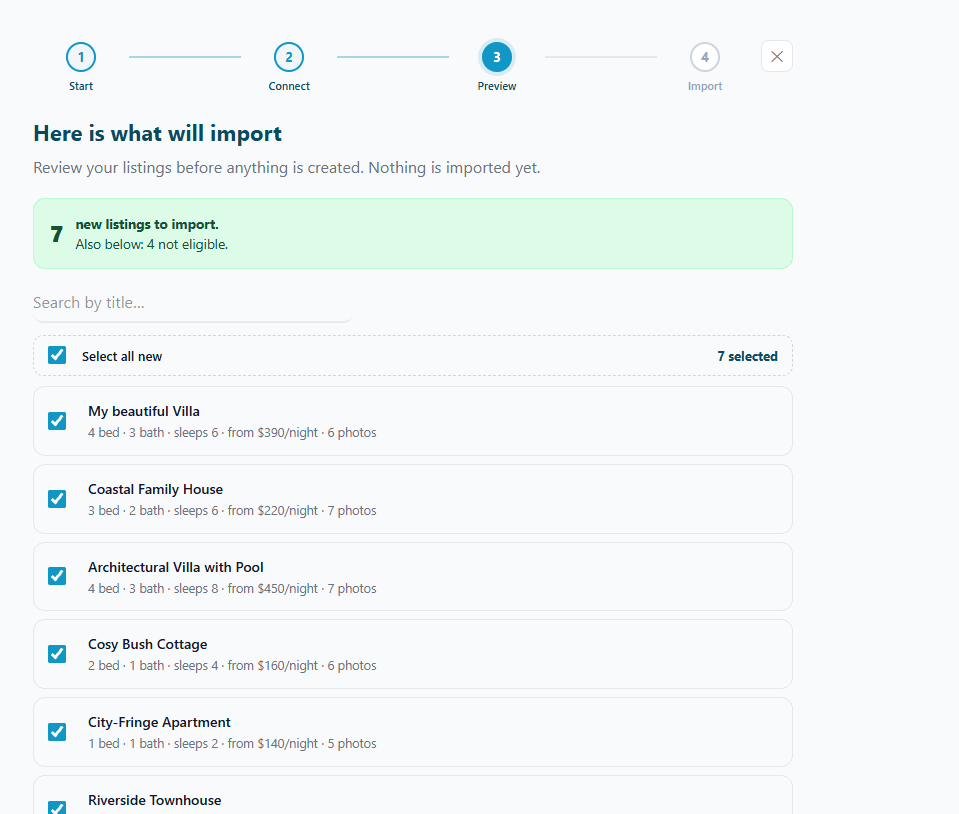
Imported listings arrive as drafts, and your Hostaway titles and descriptions come across as they are. Before a listing goes live you will confirm a few details Hostaway does not hold, such as your IRD number, GST status and cancellation policy. The Host Assistant pre-fills what it can. When your selection looks right, select Import selected.
Step 5: Import
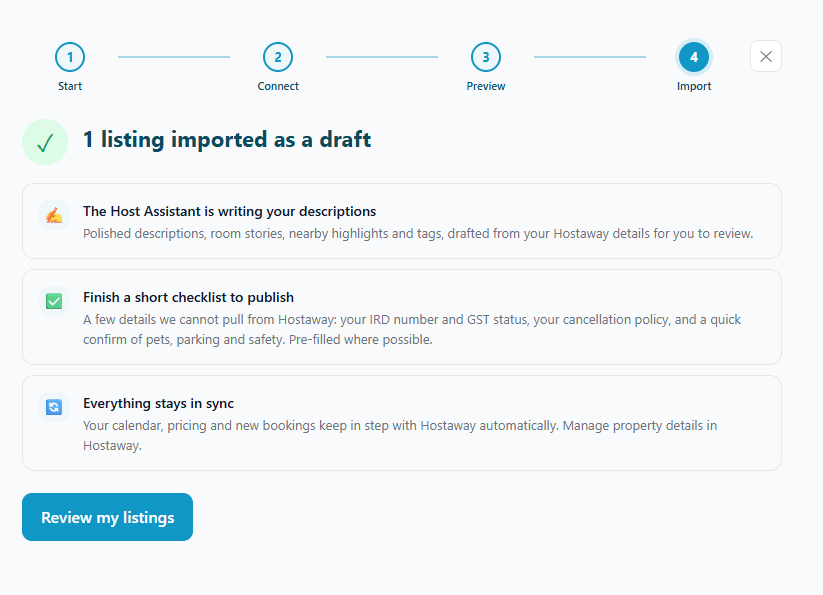
Bookably brings each property over one at a time, copying its photos as it goes. Keep the screen open while it works; it usually takes under a minute.
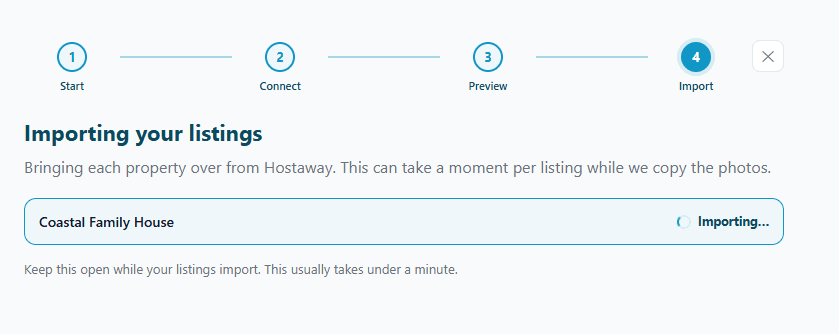
When it finishes, your listings are in as drafts. From here, the Host Assistant drafts your written content (descriptions, room stories, nearby highlights and tags) for you to review, there is a short checklist to finish before publishing, and your calendar, pricing and bookings stay in sync with Hostaway automatically. Select Review my listings to continue.
Step 6: Review and publish
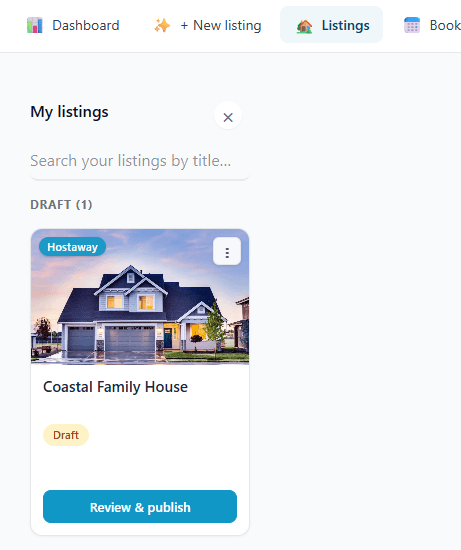
Your imported properties appear under My listings as drafts, each marked with a Hostaway badge. Select Review & publish on a listing to open it.
The Host Assistant walks you through each section. Fields brought across from Hostaway are marked Synced from Hostaway; AI-drafted fields show a soft amber band, so you can accept them with a tick, type over them, or polish the wording with Improve with AI. Then finish the few details New Zealand requires before a listing can go live:
- GST status and IRD number, where they apply to you.
- Cancellation policy, confirmed for Bookably.
- A quick confirm of pets, parking, safety and house rules.
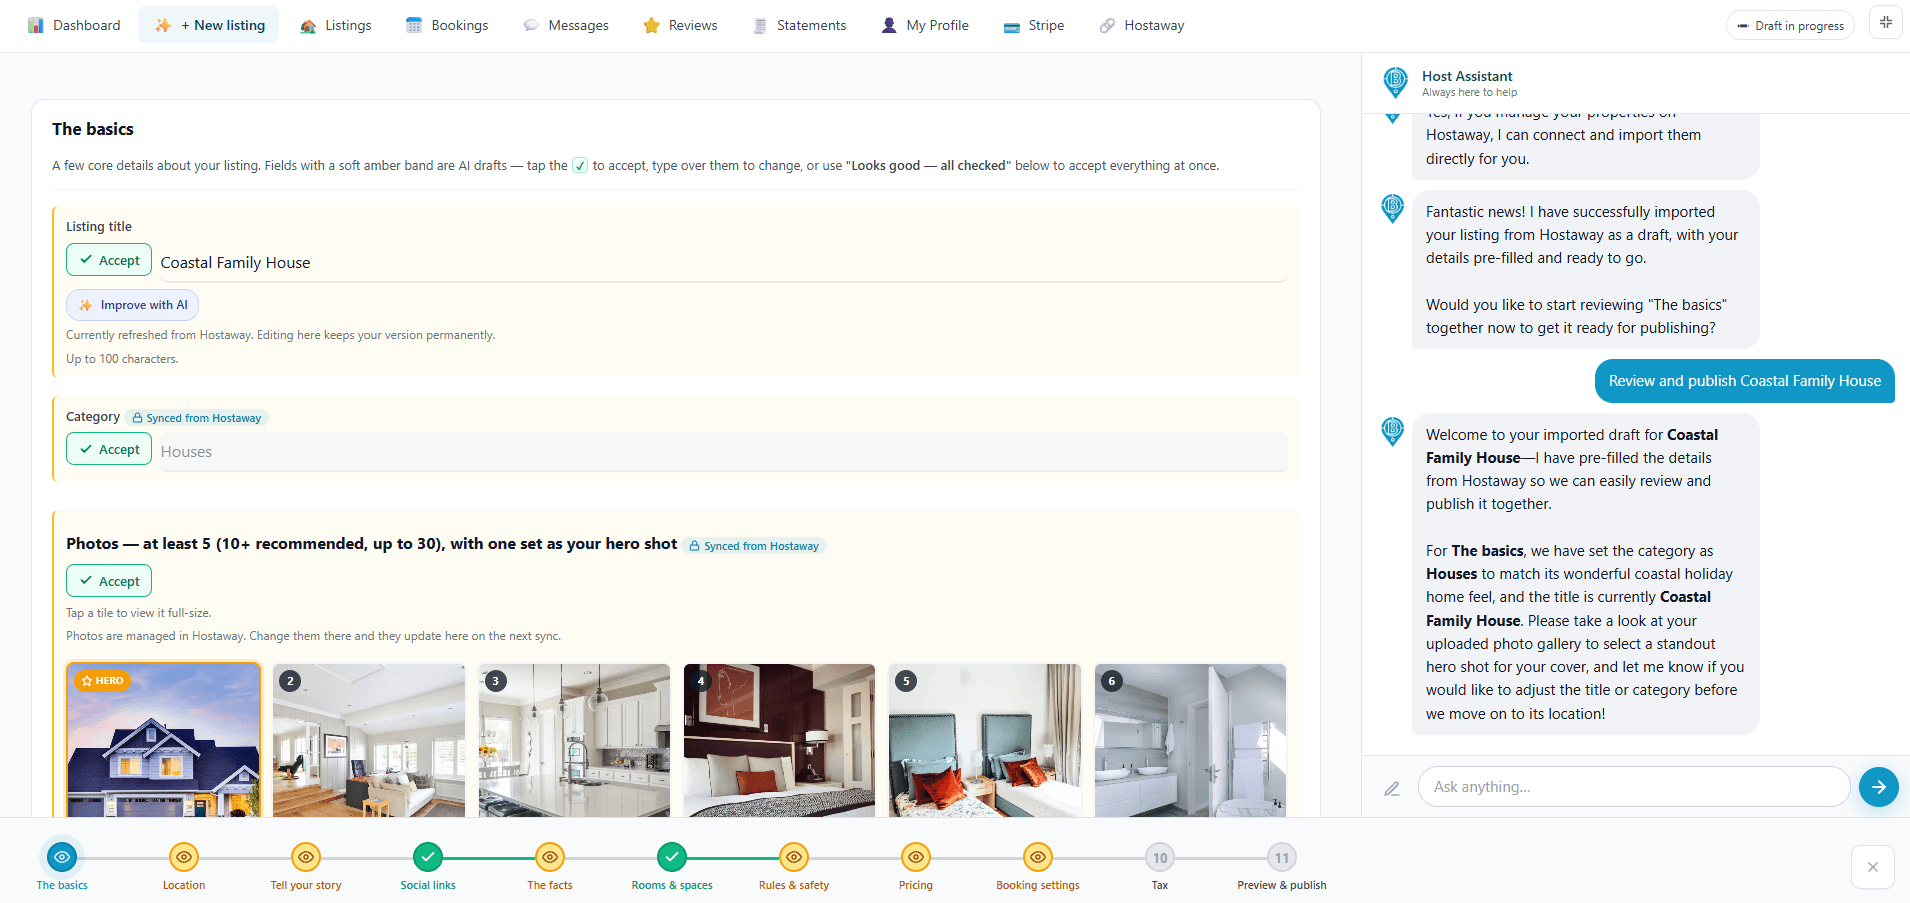
When every section is confirmed, publish. Your listing appears in search results straight away.
How syncing works after you connect
- Hostaway stays the master. Keep managing property details, photos and pricing in Hostaway, and Bookably keeps your imported listings up to date.
- Availability is managed in Hostaway. Block dates or change prices there and they appear on Bookably within the hour. A booking taken on Bookably flows back to Hostaway as a paid reservation, so your dates never clash. The calendar Bookably shows for a synced property is view-only on purpose, so the two can never drift apart.
- Guest messages come through. Messages for a Bookably booking are passed to your Hostaway inbox, so you can reply from one place.
- You keep more of every booking. Bookings made on Bookably carry 0% commission and no guest service fee.
Once connected, a Hostaway item appears in your top menu. You can reopen the import screen there at any time to bring across listings you added in Hostaway later; anything already imported is marked On Bookably so you never import it twice.
Disconnecting
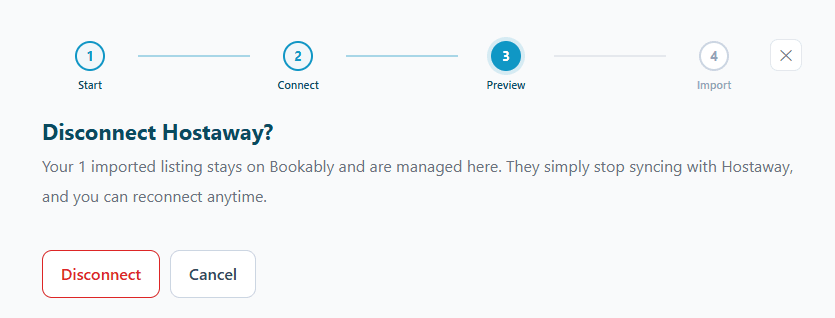
You can disconnect Hostaway at any time from the import screen. Your imported listings stay on Bookably and are managed there; they simply stop syncing with Hostaway, and you can reconnect whenever you like. Disconnecting in Bookably does not change anything in your Hostaway account.
Need help?
You can ask the Host Assistant anything while you connect, it is there for guidance, not just data entry. For anything else, contact Bookably Support.